Tutorial
How to upgrade your Zinwe plan and pay by UPI, bank transfer or card
Move from Free forever to Startups, Teams or Businesses: compare plans, pay by UPI or bank transfer in India (or card and US bank from abroad), upload the receipt, and we switch your plan.
Zinwe team · · 4 min read
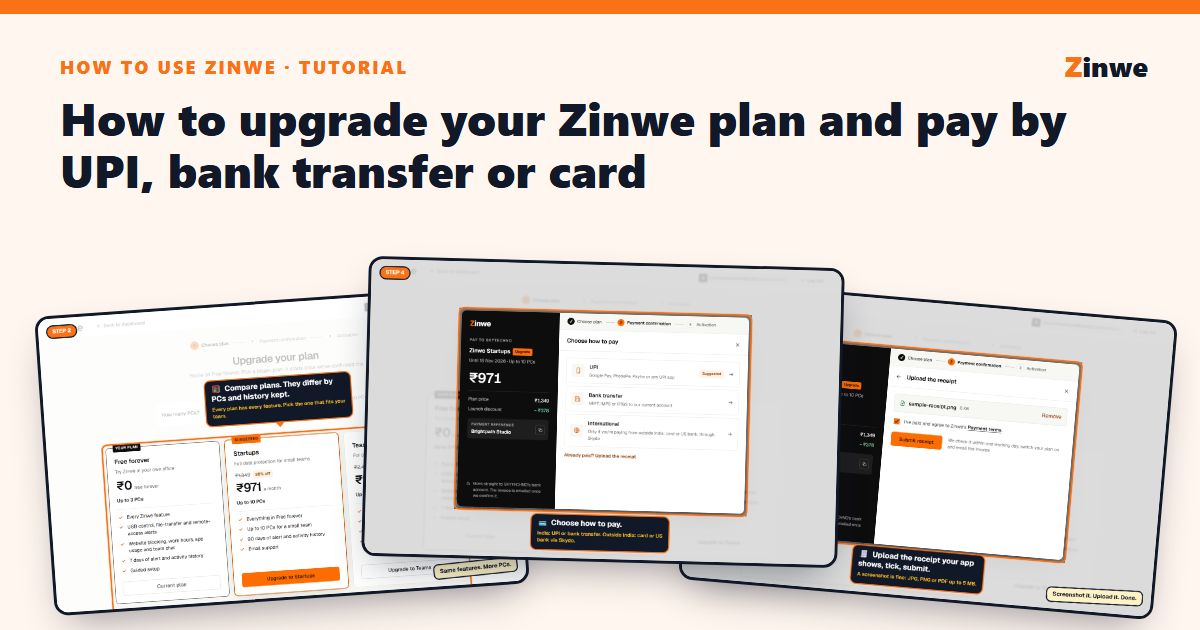
Short answer: open your account menu, press Upgrade plan, pick a plan, pay the amount shown, then upload the receipt. We check it, usually within one working day, and your plan switches. Your current plan keeps working until then.
Which plan do you need?
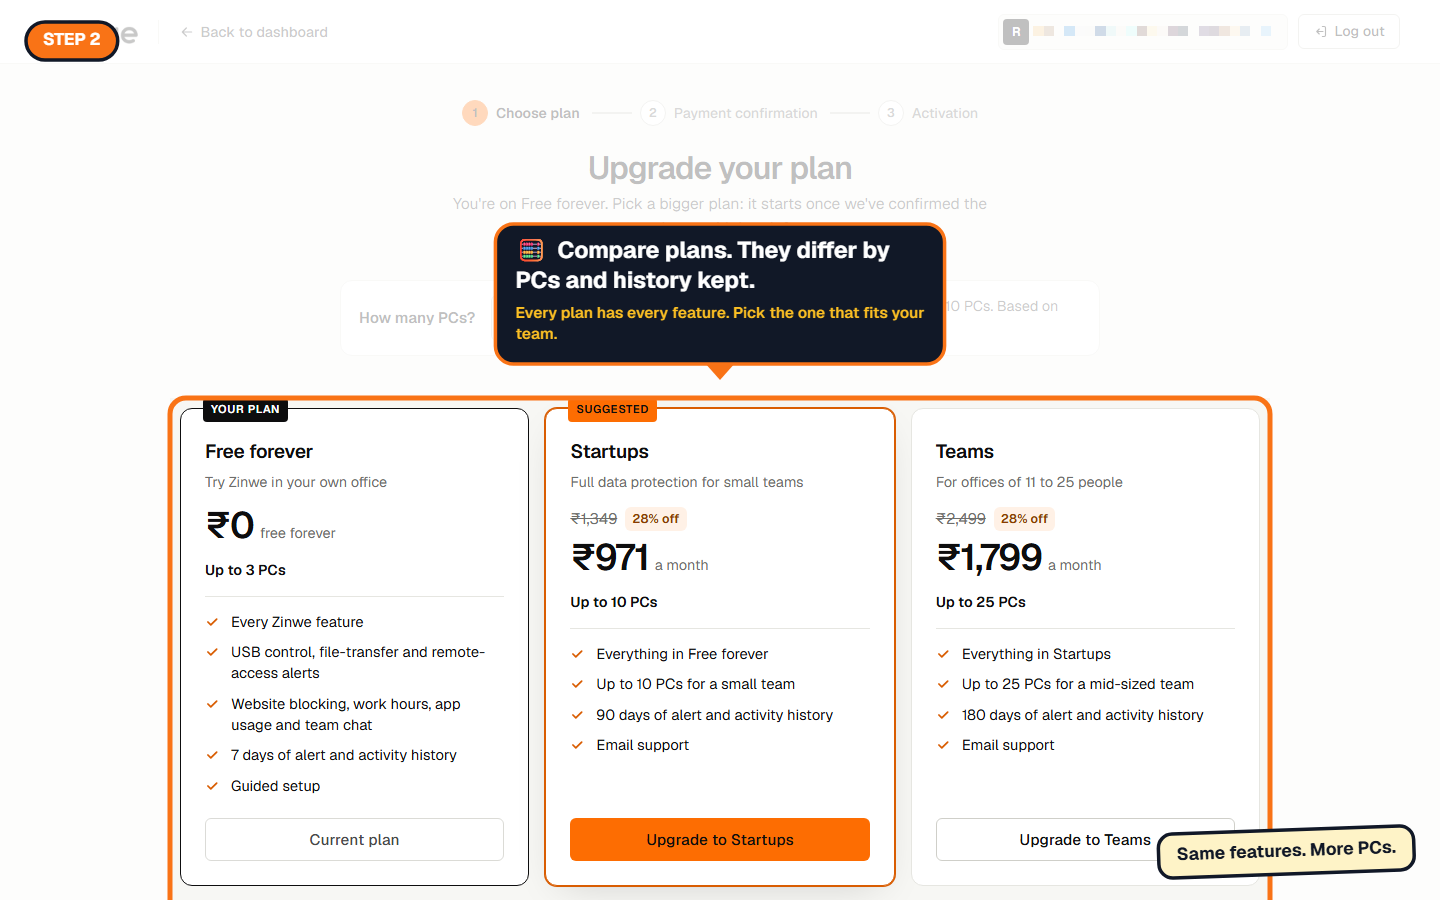
Every plan has every Zinwe feature. Plans differ only by how many PCs they cover and how long alerts and activity history are kept. Prices on 18 October 2026:
- Free forever: 3 PCs, 7 days of history, ₹0.
- Startups: 10 PCs, 90 days. ₹971 a month in India, or $12 a month billed yearly elsewhere.
- Teams: 25 PCs, 180 days. ₹1,799 a month, or $22 a month billed yearly.
- Businesses: 50 PCs, 1 year, priority support. ₹2,834 a month, or $34 a month billed yearly.
Prices can change. The live ones are always on zinwe.io/plans. In India you pay month by month by UPI or bank transfer. Outside India you pay yearly by card or US bank transfer, with no Indian GST.
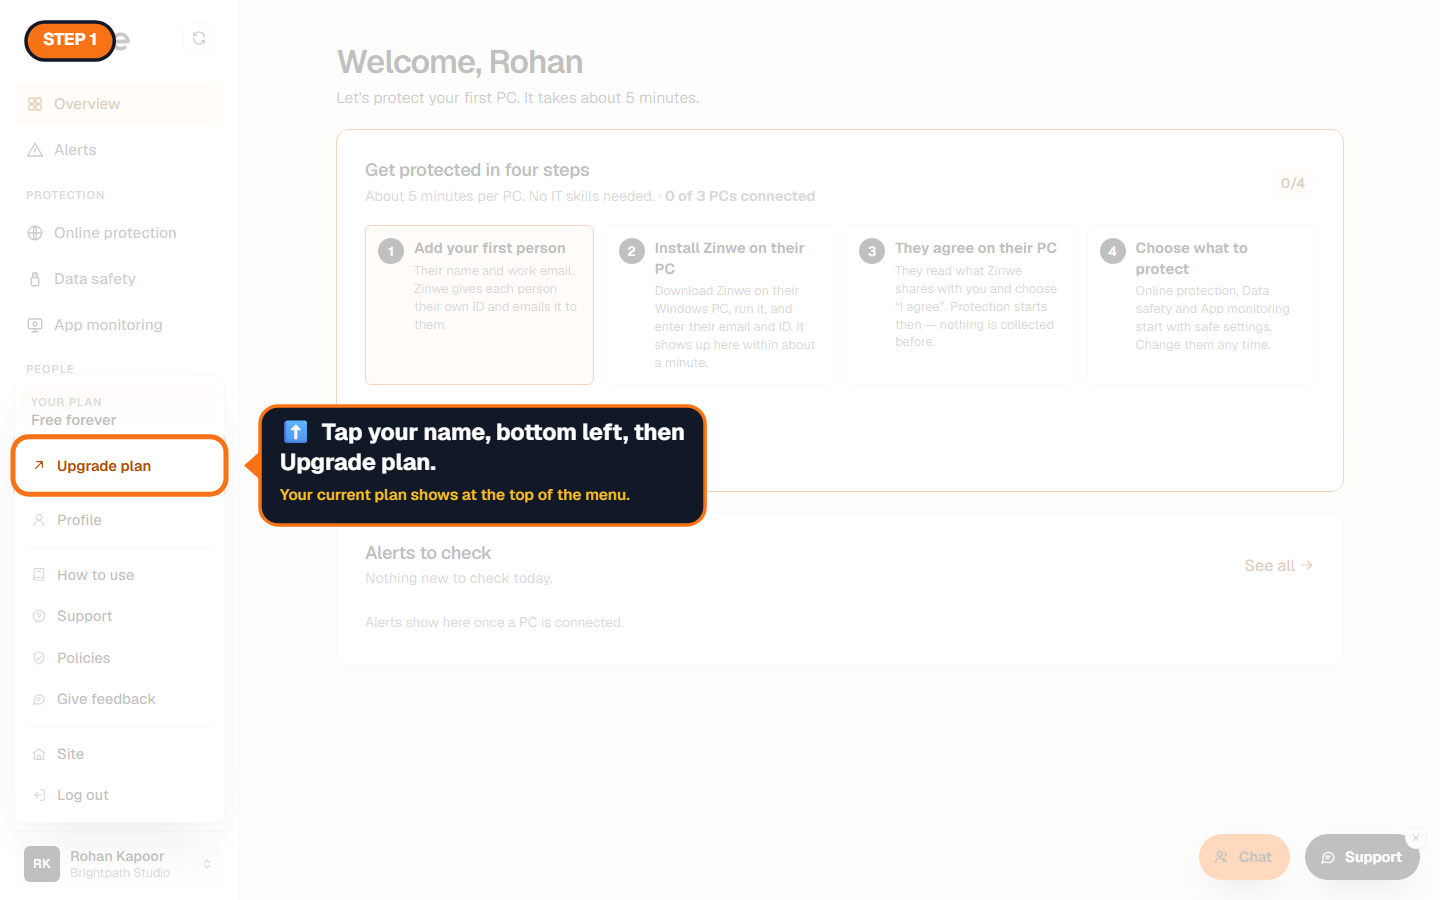
Step 1: Open Upgrade plan
Tap your name at the bottom left. Your current plan shows at the top of the menu, with Upgrade plan under it.
Step 2: Compare the plans
Use How many PCs? to see which plan fits your team. The suggested plan is marked.
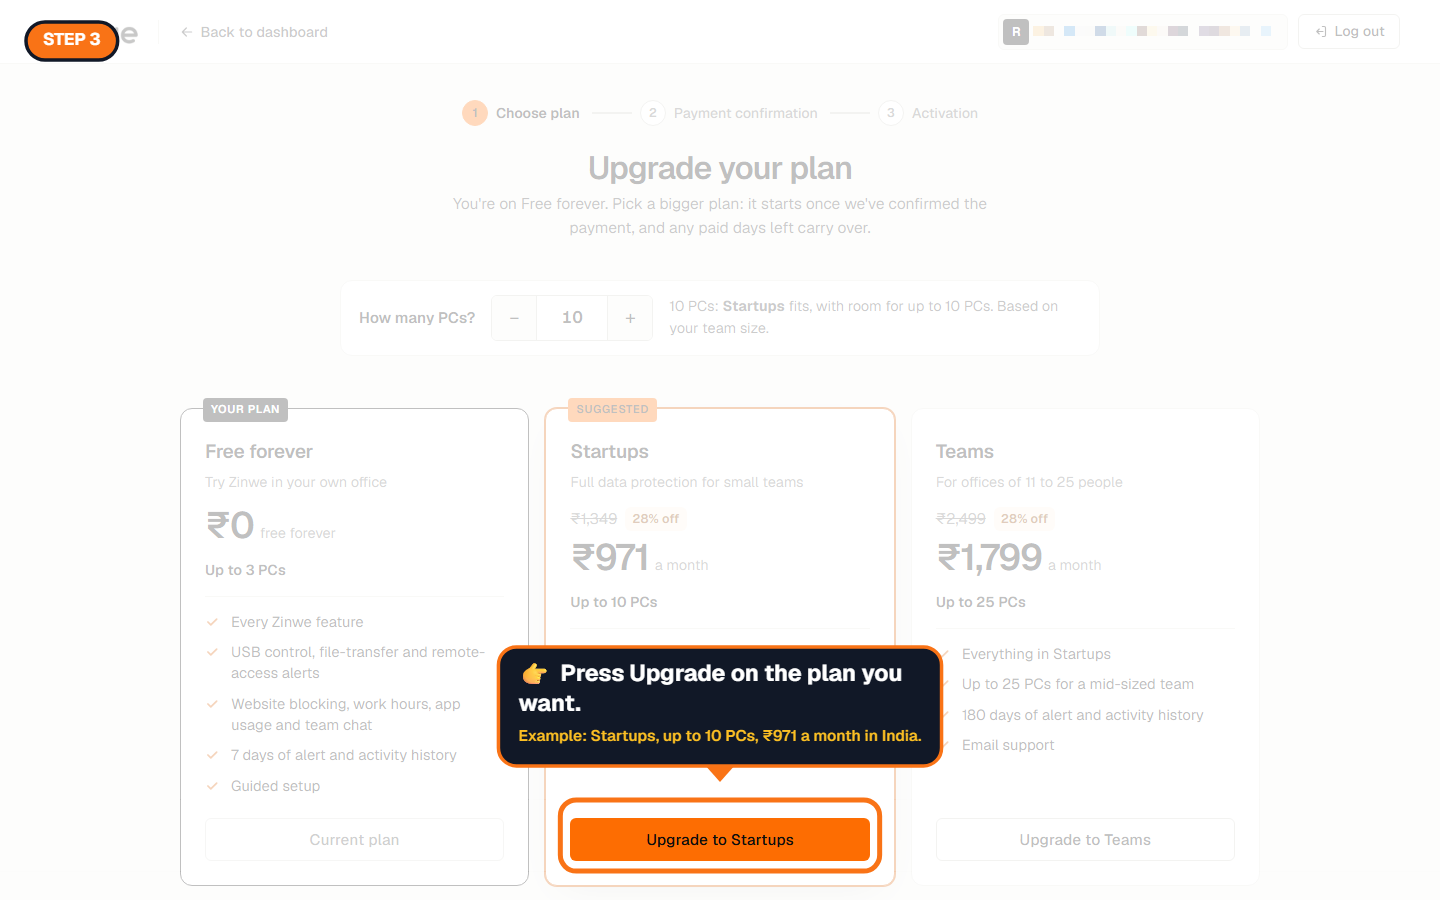
Step 3: Press Upgrade on the plan you want
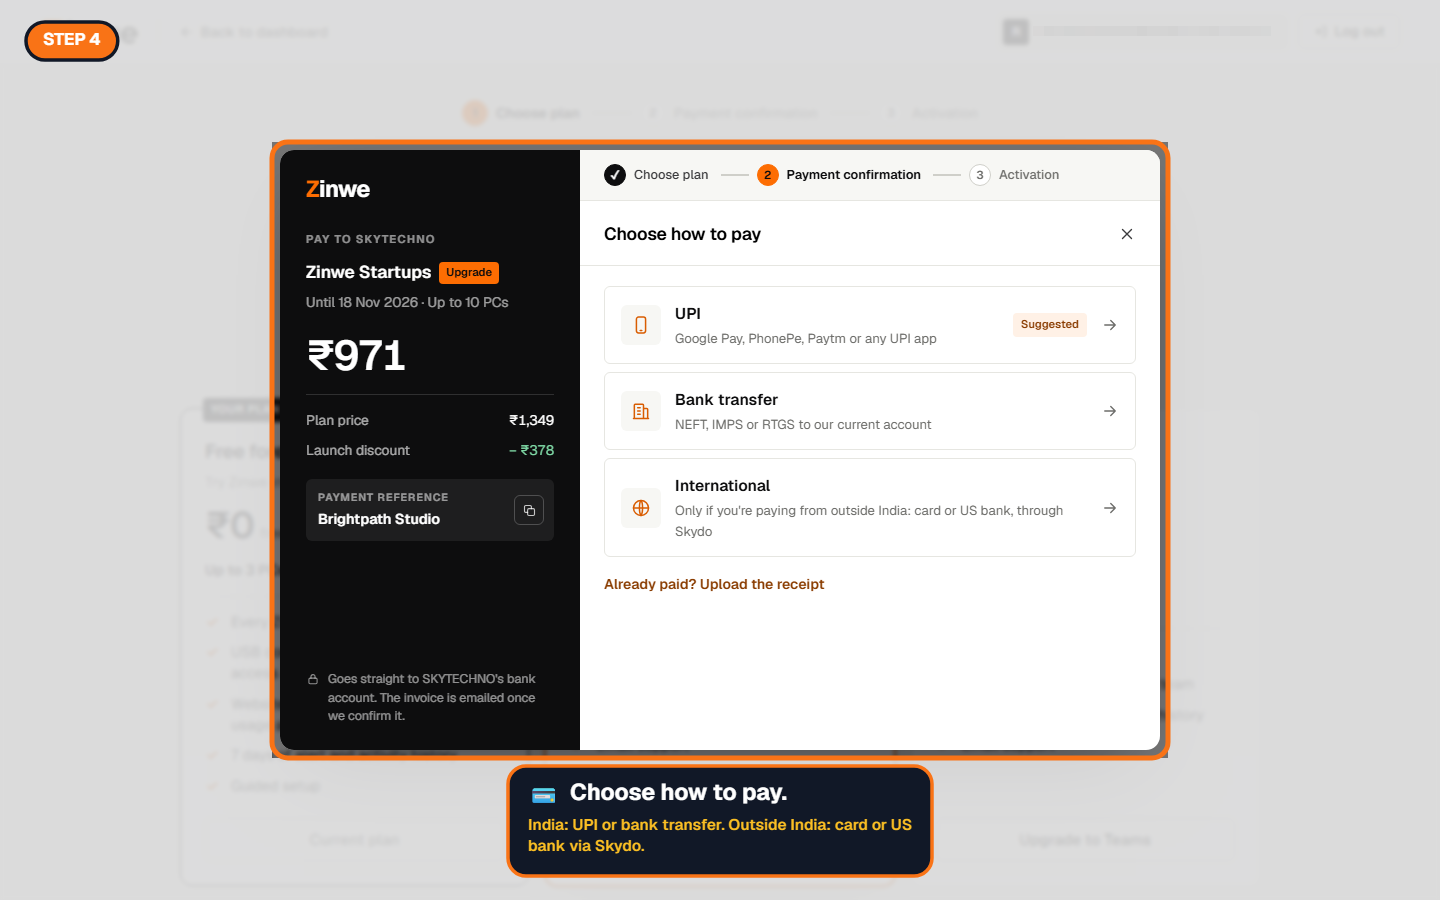
Step 4: Choose how to pay
The left side shows exactly what you're paying for and the amount. On the right, pick UPI, Bank transfer, or International if you're paying from outside India.
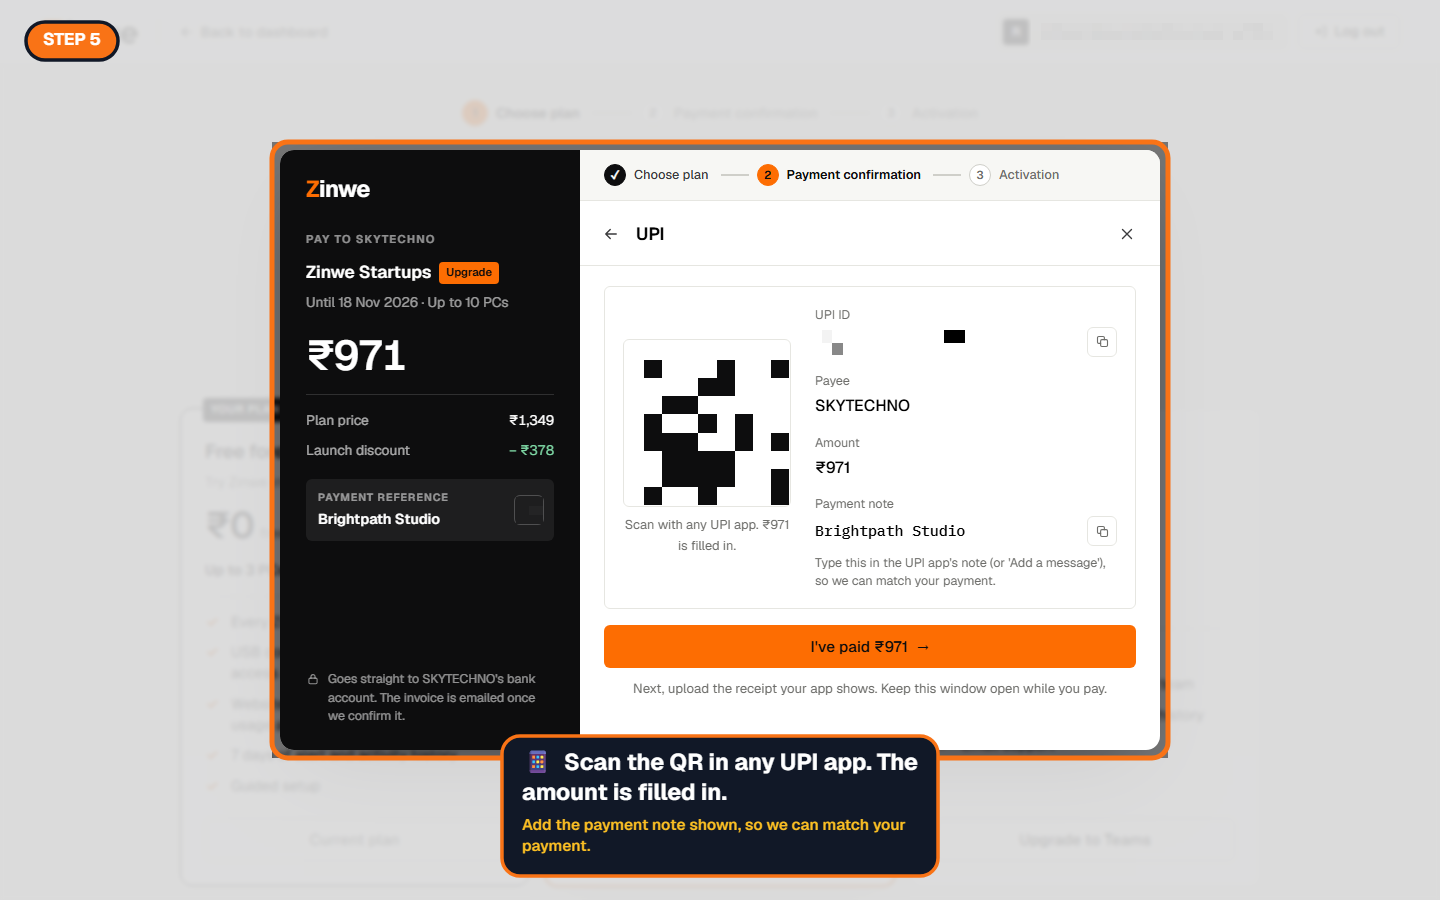
Step 5: Pay
For UPI, scan the QR code with any UPI app. The amount is filled in for you. Add the payment note shown (your company name) so we can match the payment to your account. Then press I've paid.
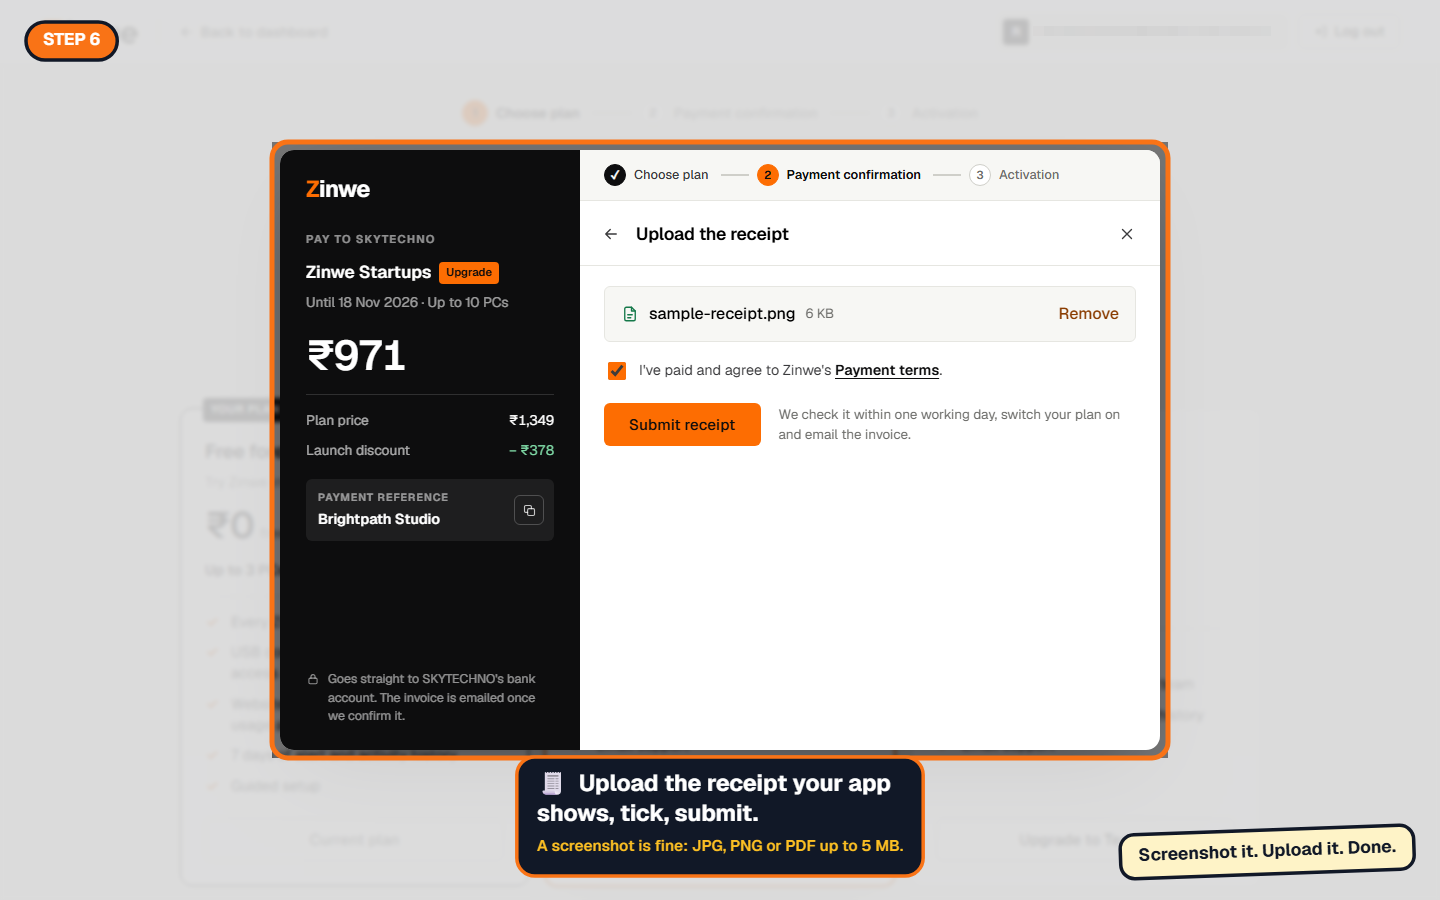
Step 6: Upload the receipt
Upload the receipt your app or bank shows. A screenshot is fine: JPG, PNG or PDF up to 5 MB. Tick the box to agree to the payment terms and press Submit receipt.
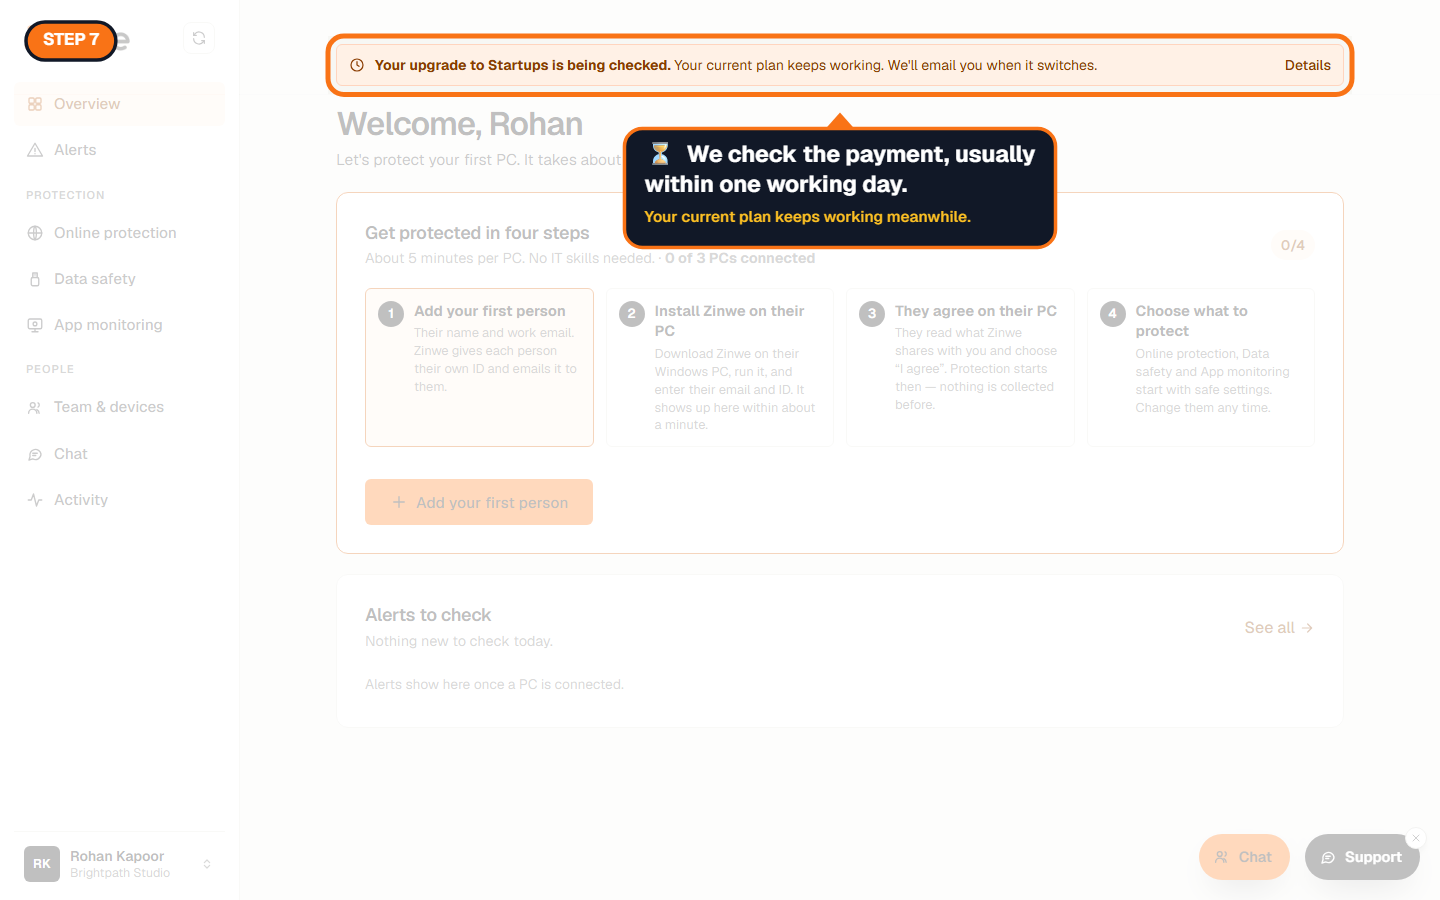
Step 7: We check it and switch your plan
A banner on your dashboard says the upgrade is being checked. Your current plan keeps working meanwhile. When we confirm the payment, usually within one working day, your plan switches, we email you, and your invoice appears in Profile → Billing.
Good to know
- Nothing renews by itself. You pay for each period, and we remind you 7 days and 1 day before it ends.
- Paying early for the next period never loses you days. It starts when the current one ends.
- If we can't match a payment, we tell you why and you can upload it again.
- Someone else pays your bills? Profile → Billing has a quote you can share with them as a link or PDF.
The How to use Zinwe series
Get started
Set up
Protect your data
- Read and handle an alert
- Control pen drives
- Block remote-access tools
- Block websites
- New-software alerts
Your team
Your plan
- Upgrade and pay (you are here)